.jpg)
The SCCA has officially announced the return to concrete for the 2009 SCCA Solo Nationals. My 250F/300R spring setup and Tokico shocks was barely passable for the slick asphalt found during my first outing with the car at Heartland Park but as the surface became grippier it became harder and harder for me to keep up with the class leaders in FP and I slid out of the tropies in 2008. Next year Nationals will be held in Lincoln, Nebraska on a very large concrete surface. Not wanting to end up mid-pack again (or worse) I figured now was the time to upgrade the suspension on the car to some decent spring rates and some shocks that could handle them!
The game plan was simple: make the car stiffer and lighter and I should be able to go faster. In the process I also wanted to make the car stronger, specifically updating parts that have been on the car for years that could be the next failure point. A reliable car is a fast car! Stiffer springs and shocks were a no-brainer as well rear strut tower bracing to handle the bigger springs. The car was about 50 pounds above minimum weight at Nationals but instead of just removing my 50 pounds of ballast and passenger seat from between the axles I wanted to reduce weight where it really counted, from the front of the car and from the unsprung and rotating masses. A fiberglass hood, aluminum front hubs with cross-drilled rotors, and an alternate rear sway bar were all on the list. As for beefing up the critical pieces, I chose to upgrade the rear stub axles, replace all wheel bearings, and swap in my Wolf Creek Racing CV axles (also lighter than half-shafts).
Based on performance, support, and price I settled on Koni 8610-1437RACE shocks as the first step in my Fall/Winter upgrade. These strut inserts are very popular in the Z community since they fit in the strut casings and are decently valved for our cars. If anything they are a bit soft in compression but it's something I can live with until the first rebuild/revalve. Another shock I considered was the Ground-Control Advance Design shock but they were considerably more expensive than the Konis and I didn't feel the need to pay the extra money for adjustable compression at this time.
From the beginning I've always run a staggered spring setup with slightly stiffer springs in the rear of the car. As I've gradually increased the spring rates the lb/in delta has remained the same but the percent difference has decreased. I started with 200/250, then upgraded to 250/300 a few years ago. This next upgrade was no different and I chose 350/400 as my spring rates. The alternate rear bar I've been saving is somewhat stiffer than the current rear bar so this should get me right where I want to be since the car has been a little "pushy" lately.
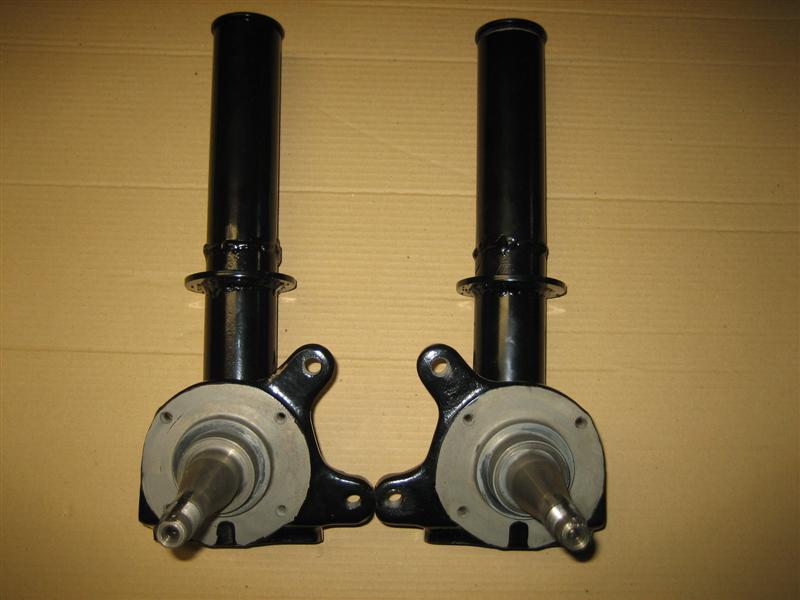
This was no rush job. I wanted to take my time and get everything cleaned up and thoroughly check all hardware and replace as necessary. At the same time, this is not one of those projects that someone buys years later in boxes, the goal was to have everything back together for the first Spokes event of 2009! First step was to strip the front and rear suspension uprights...looks like some re-painting is in order...
.jpg)
.jpg)
Boxes of parts, cleaned and ready for reassembly. Well, to be fair those spindle pins will be replaced with new and the EMI Racing camber plates are new (replacing the MSA Street Camber kit strut tops in the rear which would be too compliant for 400# springs). The rear disc brake brackets are Modern-Motosports pieces and highly recommended, more info on the great stuff from Modern-Motorsports later in the project, be sure to check out their link on my Links page.
.jpg)
.jpg)
The brakes on the car have felt great since I upgraded the rear drums to disc brakes and swapped over to Hawk HPS Plus pads on all corners. Even after losing my brake booster the car still has plenty of stopping power and the bias is right on. Not wanting to re-engineer the entire braking system, I chose to lighten up a few components while keeping the same stock-like configuration in the front. To do this I opted for some aluminum front hubs from Modern Motorsports and drilled and slotted rotors from Motorsport Auto.

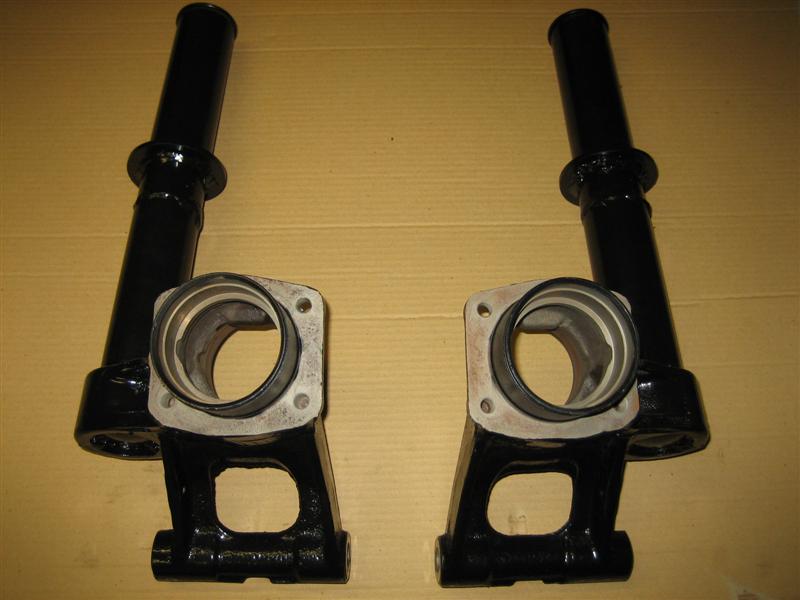
My original plan was to clean up the suspension uprights and spray them with some leftover chassis black paint. Well, while I was waiting on other parts I kept tripping over these ugly dirty pieces in my garage and figured I had a little extra time. So, I headed over to the local powdercoaters and dropped them off the week before Christmas. Merry Christmas to me, I got them back the following week and they looked awesome!
Next step was to get the Konis to fit into the front and rear strut housings and figure out if I needed to make any spacers. Before ordering the Konis I had already checked the Strut Sectioning information over at Beta Motorsports to determine whether the struts would even work in my housings. I had been running Tokico Illuminas in shortened strut housings and according to the website the measurements for the rear were identical between the Konis and Tokicos and the front was around half an inch off in the correct direction (Koni strut too short).
The new rear struts slid in easily and I made 1.5" spacers for each strut. No problem, this race car stuff is easy!
Front struts, not so much. When John says these things are a tight fit he means it. I started by removing all of the paint from the Koni shock body and grinding down the weld and where the part number is stamped on the body. Still no go. Then I followed John's advice and started to open up the ID of the strut housing. This took several days after work and I tried a few different tools. What I found to work best was a 2" 60-grit flap wheel on an 18" drill extension. How does a 2" flap disc work in a 1.75" strut housing? A hammer. I used the hammer to bend the vanes on the flap wheel until it would just squeeze into the housing. This method used the built-in tension of the oversized wheel to take off as much matieral as possible on each pass. Patience helps too, whatever you do, don't force the shock into the housing! (And yes, TrueChoice will sell you just one shock, nuff said.) Hopefully this helps someone out there.
.jpg)
.jpg)
The first Datsun I bought when originally starting my FP build came with a Suspension Techniques rear sway bar that mounted behind the diff. The second shell I bought that ended up becoming the FP car already had a rear bar that mounted to the frame rail behind the front seats so I ended up using that one. I kept the ST bar since I had heard that the behind the diff mounting was preferred and eventually wanted to swap it out.
Since my plan was to go stiffer and lighter this bar was perfect for both goals. I wanted to see how the rate compared to the bar that was on there so I used this great Sway Bar Rate Calculator to determine that the ST bar was ~38% stiffer than the old bar even though the diameter is smaller. That's about where I want it to be but can always swap the old bar back in if the rear is too loose after the upgrade. Another benefit of the rear mount bar is that it makes removing the driveshaft much easier, something I've had to do many times unfortunately.
.jpg)
.jpg)
Some folks on HybridZ.org (great site btw) have noticed that the rear mount sway bar end links can bind on these bars and suggested spacers under the mounts. I cut up some 1/2" aluminum stock for this purpose, will determine whether they're necessary when I mount the bar.
.jpg)
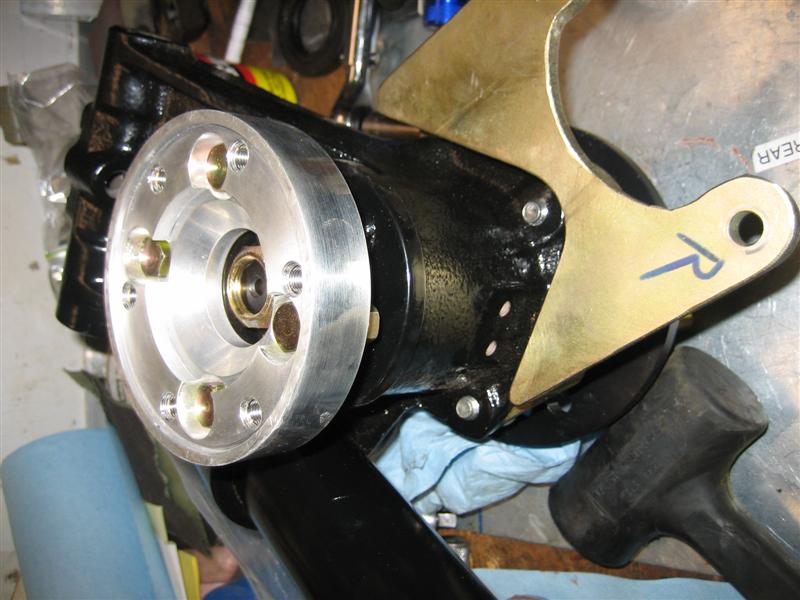
Ross Corrigan over at Modern-Motorsports has some really trick stuff for our old Z cars and these stub axles are no exception (I run his rear brake disc kit on the car too). He offers these stub axles in many different bolt patterns but I opted for the stock 4-lug pattern since I did not want to replace several sets of wheels. They come with genuine ARP studs which is a very nice touch.
I had never had the rear stub axles on this car apart before and was relying on some unknown previous owner's maintenance over the last 30 years. Replacing this stuff now gives me piece of mind that it's done right and with the highest quality parts available. Since my old stubs were 240Z pieces I had to source some 280Z companion flanges from a HybridZ member for about $60. New rear bearings were ordered to complete the project.
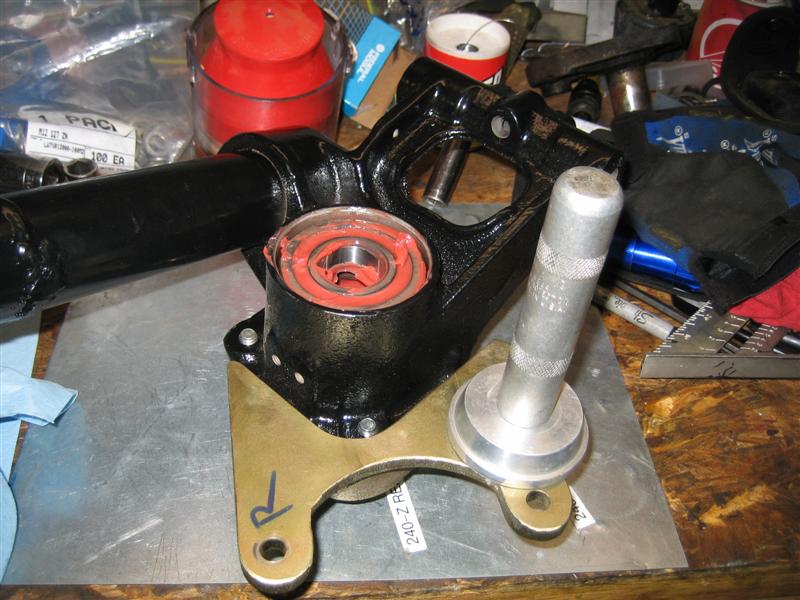
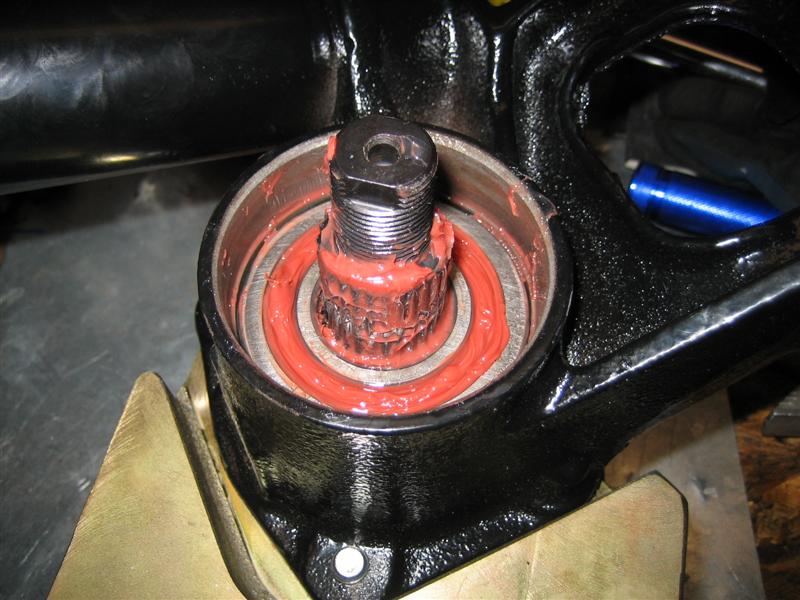
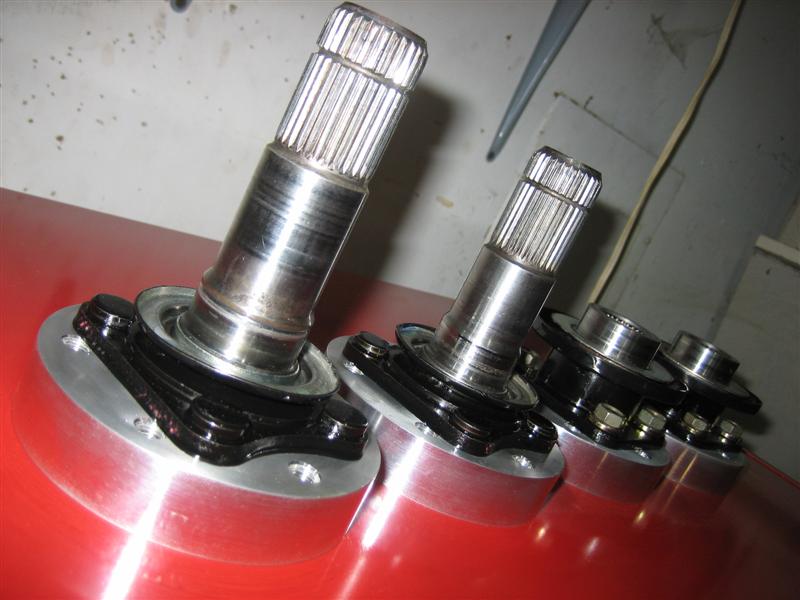
Installation of the new hubs and bearings was completed without incident. I was worried that my cheapo Harbor Freight press was not up to the task so I set the stub axles in the freezer for a bit before attempting to press on the outer bearings. While they were in the freezer I found a suitable piece of pipe to use with the press that matched the inner race exactly. Turns out the the bearings went on easily with minimal complaints from the hydraulic press. I used the same press to install the stub axle assembly into the hub with inner bearing.
The only minor oversight I encountered was not pressing the seal in far enough on the first hub. This was detected by rotating the hub after assembly and noticing a fair amount of drag. I removed the companion flange, reseated the seal, and all was well after that. I used Redline CV-2 synthetic grease for everything on this project (3 cartridges total for all bearings and CV joints).
And, everything is back together again.

A rear strut brace had been on my "to do" list for quite some time. This winter I finally got around to it. I cut a piece of 1.5" .120 wall DOM tubing to fit and welded it in. This should keep the rear uprights from flexing too much with the new stiff springs. I could have spent a little more time here with some triangulation but it will work for now.

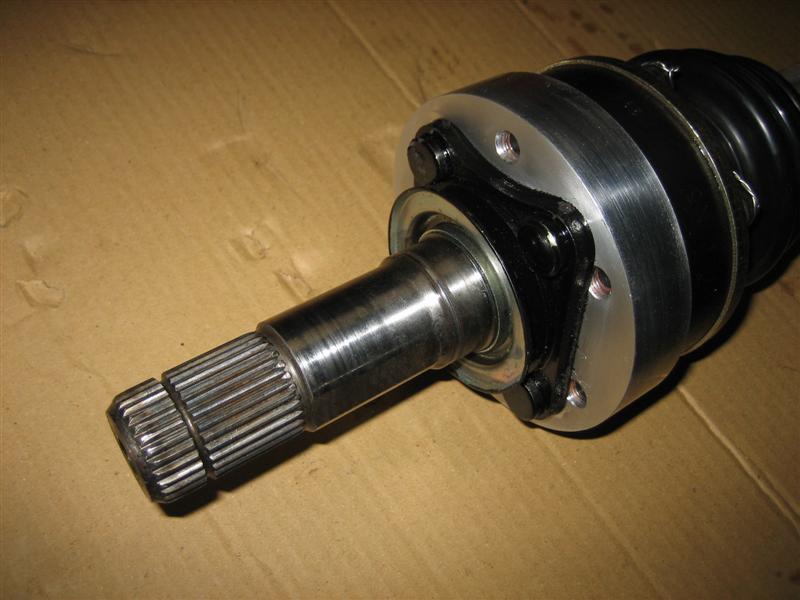
Last year I had bought a used GT2 motor from Todd over at Wolf Creek Racing and noticed that he sold a very nice CV kit. I was familiar with the other CV kits available for the Z but most of them required sourcing components from different vendors, finding rebuilt axles that may be of dubious quality, etc. Todd's kit is a 100% bolt-in solution and it comes with all new components. As an added bonus, the CV joints are easily removable from the axle for cleaning/refresh. Only drawback to this kit is that the CV guts are exposed whenever you remove the axle. Minor in my opinion.
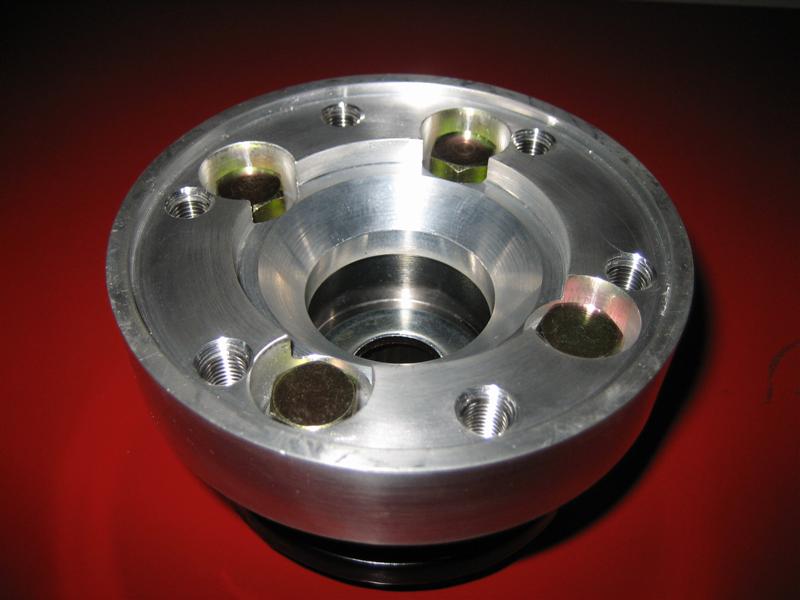
After unpacking the Wolf Creek kit it's obvious that this is a well engineered solution with the highest quality materials. All hardware was included, the 5/16" CV bolts were pre-drilled for safety wire, and the threaded holes in the aluminum adapters included steel threaded inserts. Sharp! The adapters fit the stub axles and companion flanges precisely with no slop or interference, not too bad for interfacing with 30+ year old parts!
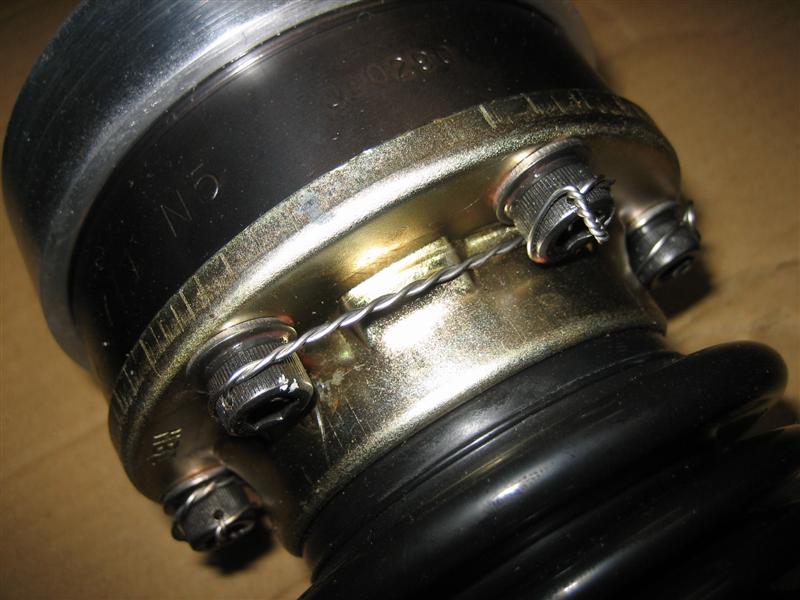
This was only my second experience with safety wire and I learned a lot. Repetition will do that. Fortunately the inner joints could be wired with the axles out of the car. Even doing this on the bench in a vise was a lesson in patience (and new curse words). Fun stuff!
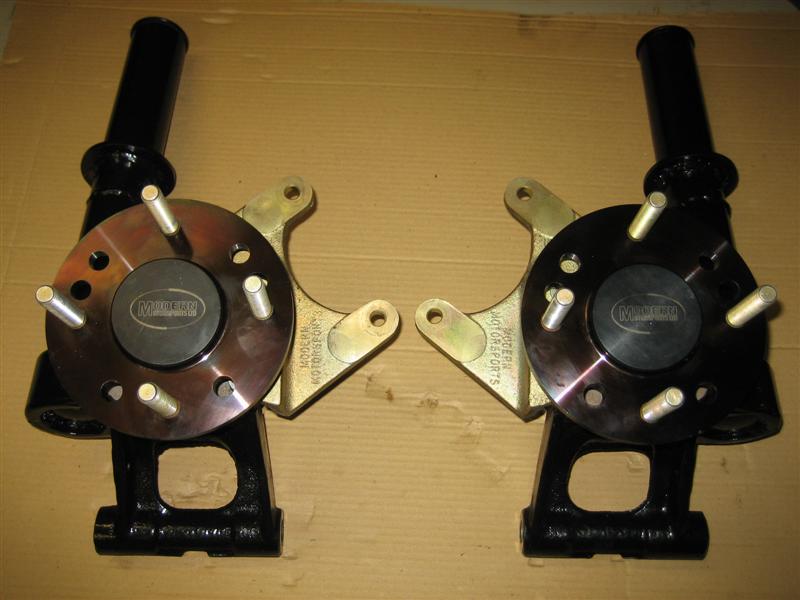
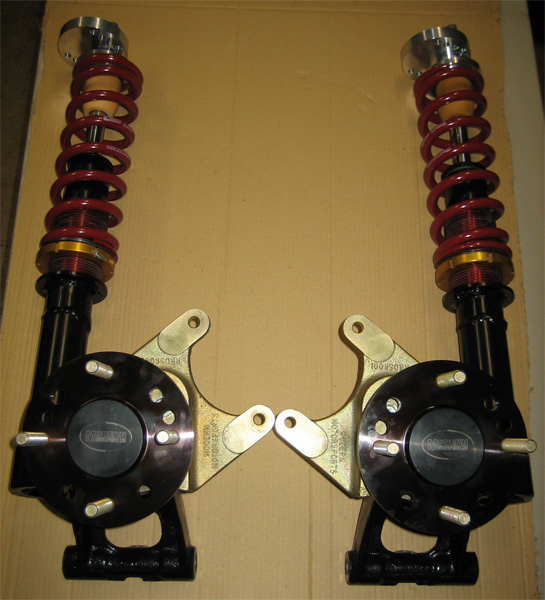
And here is the "completed" rear suspension. New Koni struts in refreshed powder coated housings, new spindle pins and hardware, new stiffer springs, camber plates, new (to this car) sway bar, and of course the CV axle kit. Since this picture was taken I've also installed a set of new sway bar end links that are 5/8" shorter to increase the clearance between the CV boot and bar at full droop. I also safety wired the outside CV joint, which was about ten times harder from under the car than on the bench.
You know what? I shoulda done the control arms...maybe next year!

